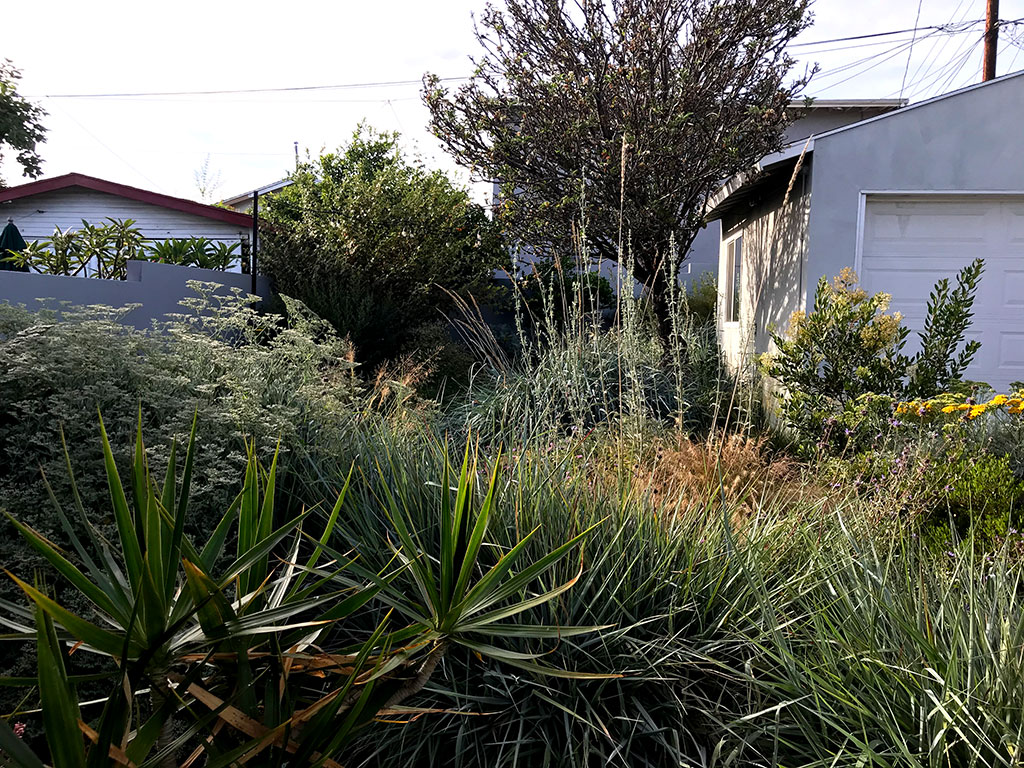
It has become almost an obsession planting California native plants around my home for the past four years. It has attracted animal species that I didn’t know exist in the middle of the City. This obsession lead to my home getting selected for the yearly Theodore Payne Foundation Garden Tour in 2020. The foundation consists of horticulturists from Southern California that educate communities in sustainable gardening. My wife and I are active in advocating for environmental justice and for sustainable gardening that preserves our natural flora here in East Los Angeles. Being selected for the tour made us proud.
Digital Immortalization
I decided to create an online presence for people to better understand the personality of the garden. It has an Instagram account (https://www.instagram.com/s17.la) and a website (http://www.s17.la). I also developed a database of all the plants I have in my garden. This database would be for personal use and to refresh my skills in MVC.
My skills are primarily Frontend development and animation. When being exposed to MongoDB years back when Node.js first emerged, it got my attention because of the JSON-like appearance. Backend development isn’t my expertise but using MongoDB with Express and Node, for some reason clicked. I completed the introductory MongoDB University lessons and that helped me better understand the platform.
Over the years, I created a boilerplate MVC that include Handlebars.js for my views templating. Wiring React.js to MongoDB has been an ongoing work in progress so I am holding off using React for this project at the moment.
Tag You’re it
The use case for the app would be simple. Users would be mainly my wife and I. We both log into the admin site, create a new plant profile, add info, and then snap a picture. We probably have a few hundred plants so having everything inputed into the app has been a work in progress. I decided to create a view that would make these plant profiles public. I then embedded the public URL into NFC tags for each plant. Finally, I glued the tag on a plant markers for tour guests to interact with in person.
Add profile, add image, then finally embed URL to NFC tag.
Integrate with The Physical World
To add fun to the project, I decided to integrate a Particle board microprocessor to measure the moisture level on a specific area of the garden. This area has fast draining soil and it is crucial we monitor the soil closely. Particle.io publishes data publicly and can get retrieved through their API. Luckily, there is a Node NPM package that allows your Node project to listen to events from your Particle device.
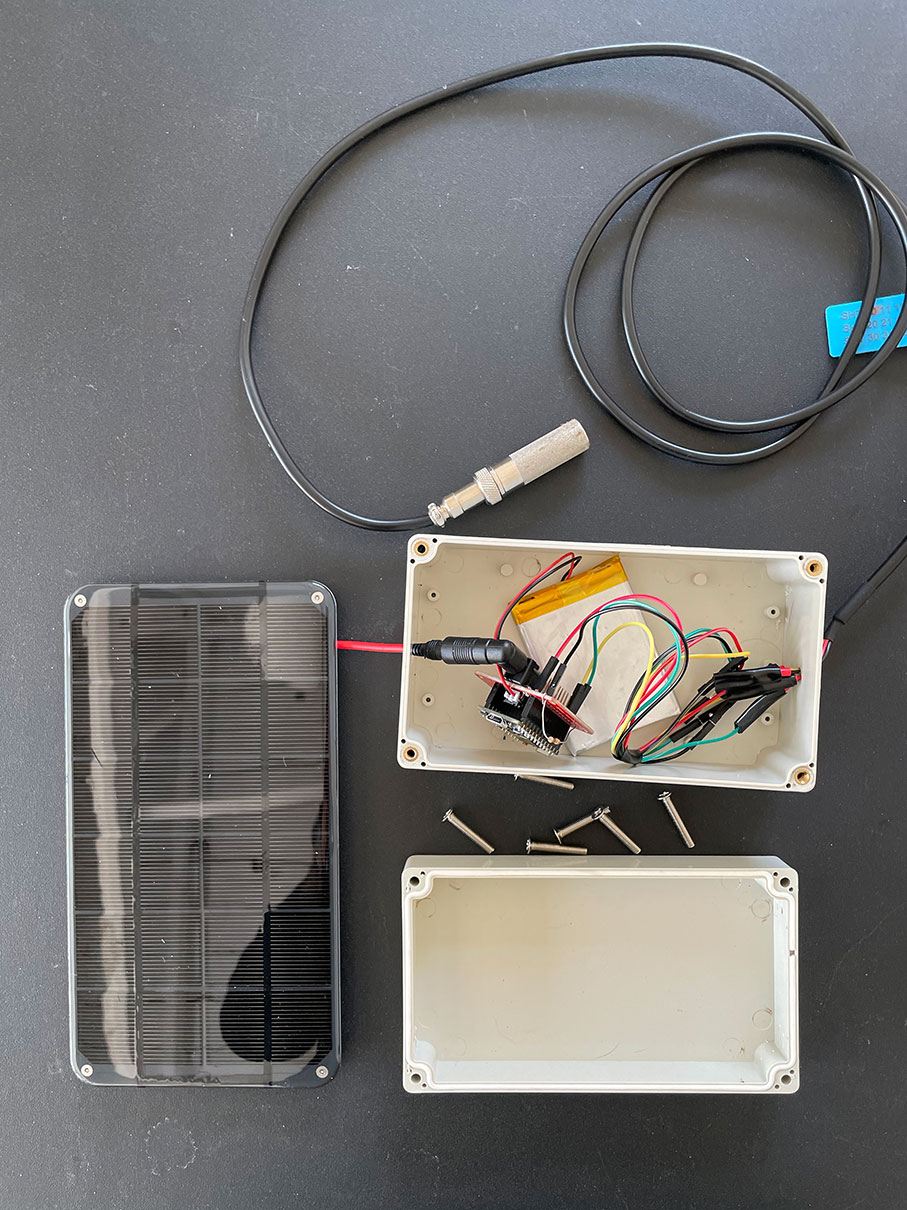
All the hardware ready for deployment.
Above you can see the hardware up-close. You have the 3V solar panel connected to microprocessor power shield. The shield powers the Particle and charges the battery. The rest of the wiring is for the ground sensor. The weather-proof housing was purchased in Amazon. I drilled two holes for the wiring going out with some water-proof caulking.
The app listens for a number from the Particle API, then pushes the data into a unique MongoDB schema. On a separate view I made a visualizer showing moisture levels every 24 hours by pulling the sensor data with a cap of five numbers that represents 5 days.
Setting the sensor in the soil. After setting up, we are live and pushing data successfully.
Finally, I used Twilio integration to have it text message me when it passes a low moisture threshold.
Doing fun work like this makes everything worth while. Some aspects of the project are still a work in progress but having the bulk of it completed is rewarding.
And one more thing…
I also made 360° VR images and videos using my old Rico Theta Camera I had laying around. The camera does not produce the sharpest images but it does the job when doing VR projects or prototypes. Check it out in this link. For the GitHub repo click here. (I still need to update my boilerplate. Don’t hate for not seeing ES6 arrow functions)
I routinely look at posts in my subscribed sub-Reddits that showcase new JS libraries, the latest in AI, and other fun maker projects. This time around, I stumbled into Google’s Machine Learning API blog post. Google recently released a JS web friendly interface that creates AI/Tensorflow models for images, sound, and human poses. Developers can create these models with any number of recorded collections created by the UI. The webcam references the collection of images, sound or human poses to see what matches closest to the created collection. It provides a HTML file and a JSON for your generated model and gets you bootstrapped to start your project.
Moments before the debut.
After a deep dive on the topic, a fun idea struck me. The idea started when I learned our office encouraged workers to wear ugly sweaters for our winter break breakfast. So I thought of an idea to have a camera look at peoples sweaters and see if they’re truly ugly.
The goal was to develop a model that can determine if anyone’s Christmas sweater qualifies as a REAL ugly sweater. First, I would generate a collection of images that are very deliberate ugly Christmas sweaters. The second would be a collection of plain boring sweaters. The AI would then would then determine if your sweater matches either collection by percentage. So if a sweater had very little “Christmas” design on it, it would identify closer to the boring sweater model. This would give you a low matching percentage. Having a real looking Christmas sweater would rate you as higher percentage.
After understanding the core structure of the API, it didn’t take much to come up with ideas on how to make this more interesting. With previous experience in the Particle IO platform, it gave me all sorts of ideas on how to make this teachable machine project more rewarding. Particle IO is a IoT(Internet of things) platform that allows hardware connectivity through the cloud. This allows me to connect the AI framework with any sort of physical hardware. In this case, I planned in using it to trigger the LED lights after each detection and turn on my remote Christmas tree in my bedroom after the 20th detection.
Challenges
Project like these don’t always come without snags. After reading documentation from Google’s Tensorflow site, I realized the Javascript version is still fairly new. Tensorflow was developed natively for a Python platform rather than a Javascript/Node.js platform. I shied away from the Node.js route since there was hardly any support for it. So I decided to do it inline with just Vanilla since the provided code came with everything inline anyway. I would then just need to add some POST calls to the Particle.io server using their web API to trigger my LED neo-pixels strip.
The second challenge in making all this work properly was internet connectivity for my Particle Photon. Not knowing the limitations on connecting to an enterprise secured wifi connection was definitely a surprise. The Particle Photon microcontroller is cloud dependent. It relies on listening and sending commands through its cloud server. Typically, enterprise internet servers have restrictions on specific ports and the Photon uses one of those restricted ports. I had to scramble over the course of the weekend in finding a workaround for this. I gave in to the fact that I may have to use an Arduino.
I never used the Arduino platform, but I felt it wouldn’t be an huge obstacle. From reading the origins of the Particle platform, it seems like it’s derived from Arduino. The void loop() and the void setup() were familiar in the IDE environment. It also has a similar include library method just like Particle. I ordered the Arduino in Amazon and received it in a Sunday morning.
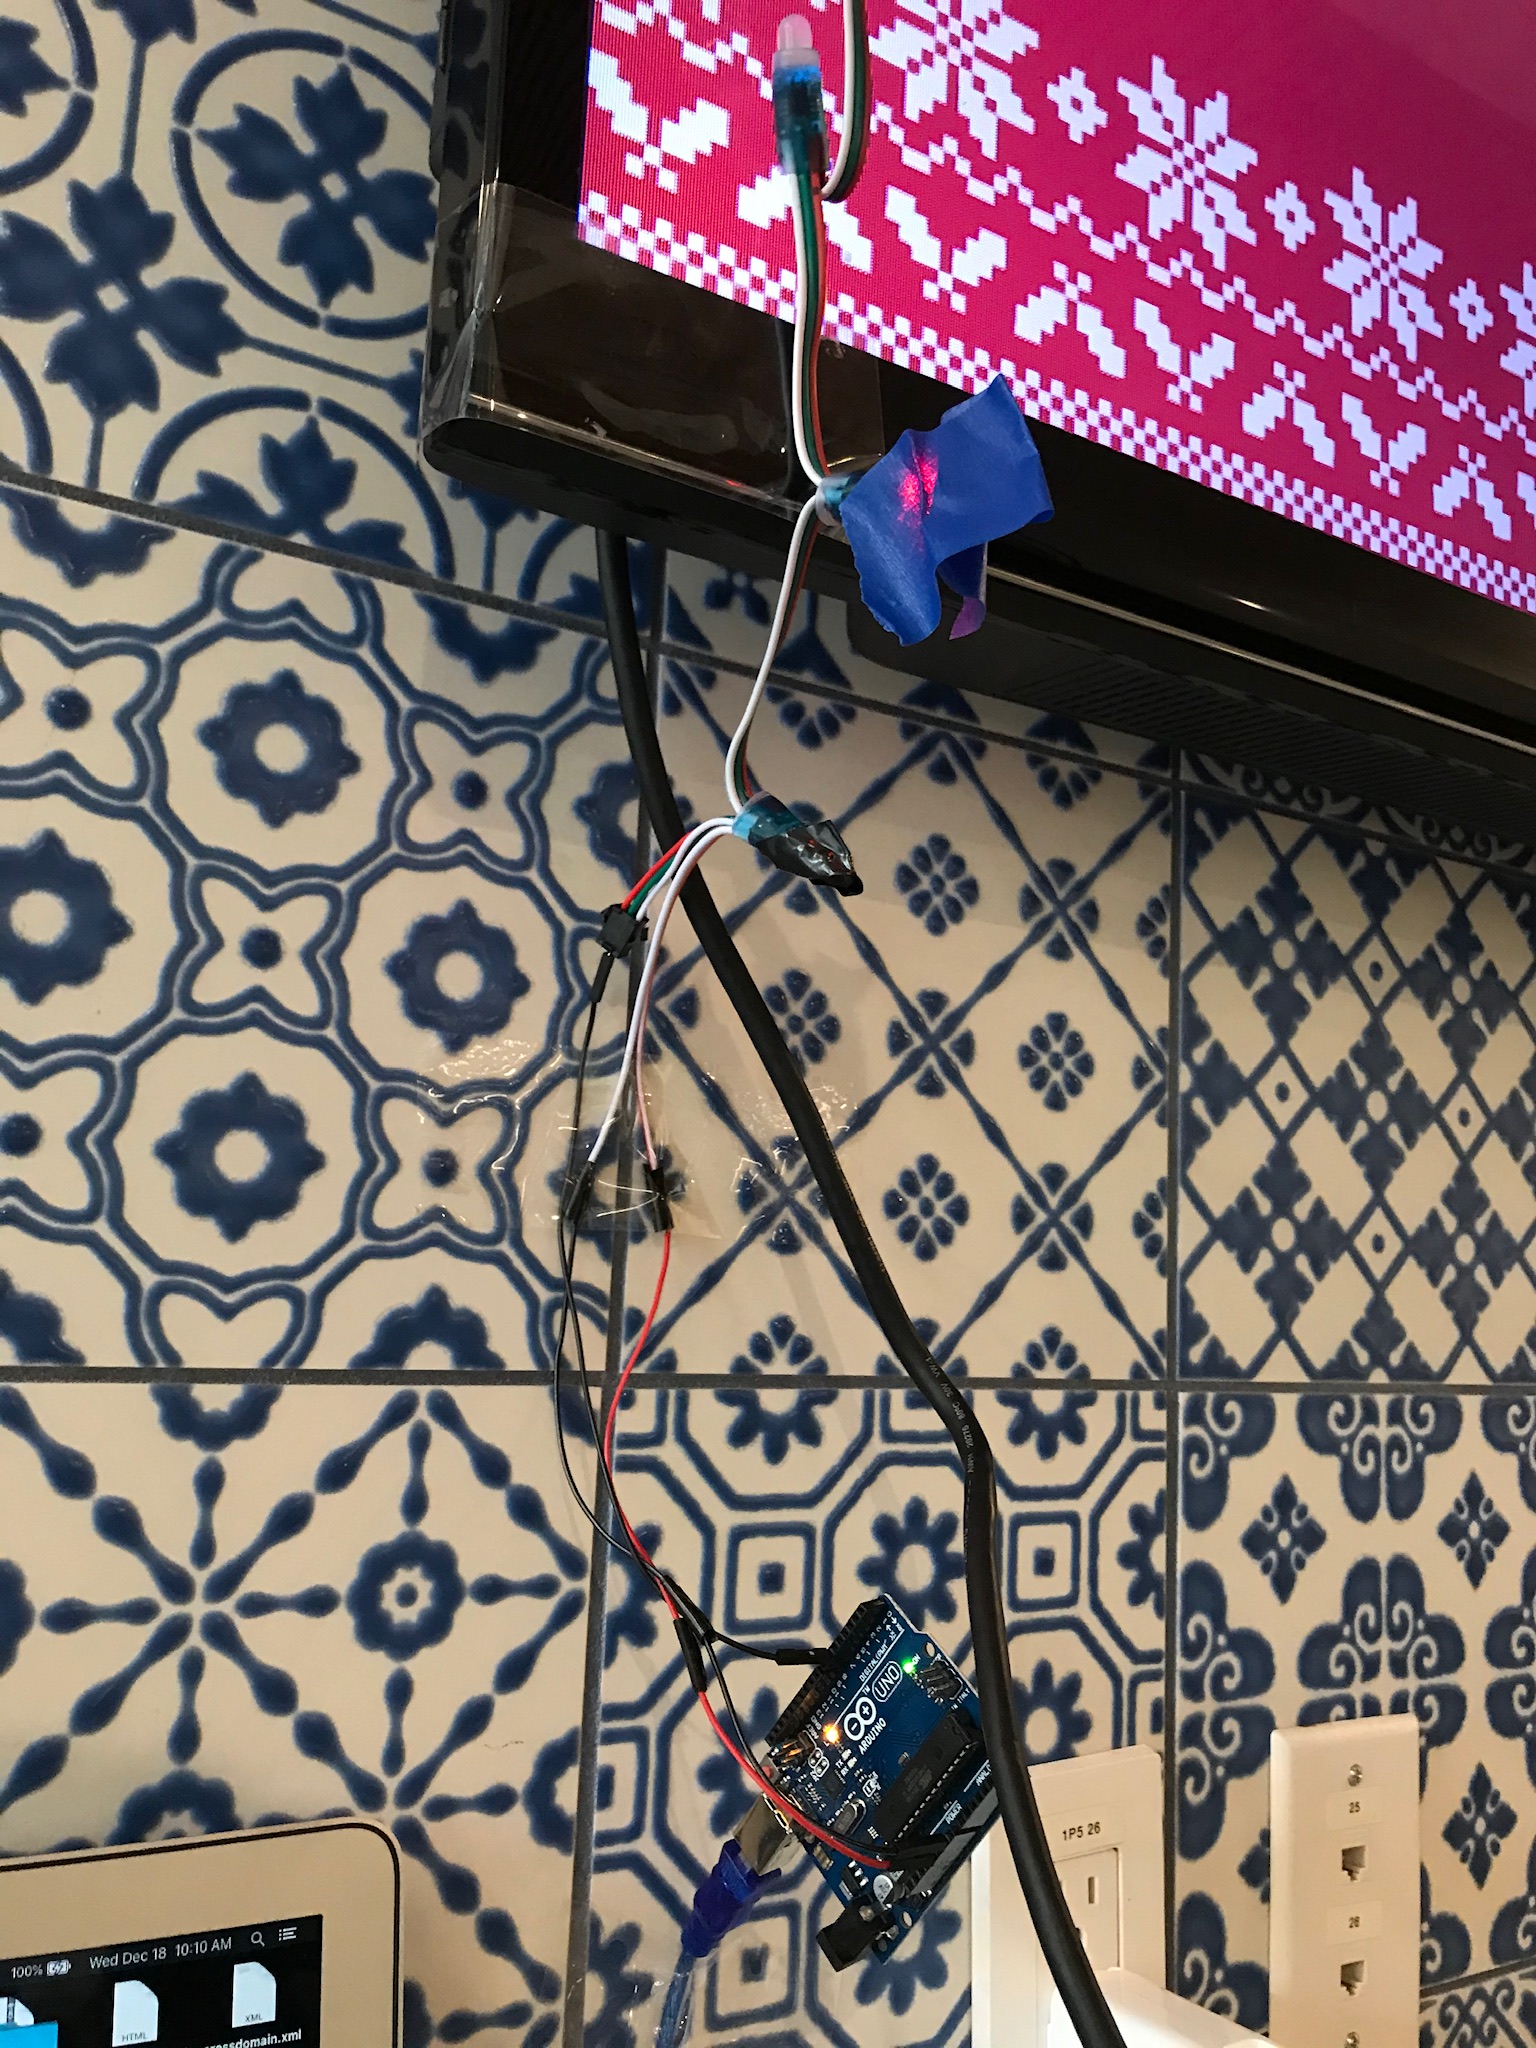
Testing Arduino before primetime.
But wait. Hold up.
Now that I have detached myself from the Particle platform, I realized I was blind-sided from the fact that I did not know hot to create communication from an HTML UI to the micro-controller. From previous Photon projects, I would rely on listening to POST commands that then triggered functions in my micro-controller. It was a struggle but eventually committed to a framework called, “Involt”. It uses CSS classes to call or listen to Arduino functions. It integrated well with my async/await callbacks.
At the time of writing this, I realized there was another framework called, “P5.js“. It uses HTML canvas for most of it methods. It seems pretty straightforward and I wish I knew about it during the time of researching. I’ll definitely try it out on another project.
The same weekend I completed a functional prototype ready to show the director of our studio the next Morning. I did not want to disappoint and I needed to make sure user engagement had a good, rewarding payoff. It would not leave an impression on the user if it just “detected” a percentage of ugliness of his or her Christmas sweater. I wanted participants committed for a long term engagement. Meaning, it needed to be designed in form of a video game or TV Game show.
Code Rundown/Tools Used
The libraries/dependencies used on this project helped bring this all together. It also helped that I could develop this in plain Vanilla or else I would have dealt with dependency hell if I used other platforms that require compilers, bundlers, transpilers, or what not. This project would be too small anyway for those frameworks.
The bridge.js and framework.js are the core to the Involt framework. The bridge.js is the core library mainly to connect the Arduino through serial/USB connection. The framework.js is the default UI that is built in. It is the initial UI to for selecting the specific USB/Bluetooth port. Pixi.js and TweenMax.js was used for the snow animations after a detection. Tf.js (tensorflow) and teachablemachine-image.min.js are the main framework JS files from Google.
Particle.js was used to validate my Particle.io user credentials to make API calls to my Photon cloud. In this case, it made a POST command after the 20th ugly sweater to light up my remote Christmas tree at my home.
For any developers interested in the code working behind the scenes check out my project’s GitHub.
Design
The design was centered around the 8-bit style combined with the ugly Christmas sweater knit. This art direction was a no-brainer.
Even though I had a mental visualization of how the UI would look, I just didn’t have the time or resources to create the artwork from scratch. I am familiar with design and illustration but I didn’t have the bandwidth because I needed time to develop the software and hardware. Luckily, I had a last minute resource that provided key art sufficient to cover most of the UI states. I was also lucky to find a free-ware ugly sweater font.
The Presentation
I needed to set up a camera on a cafe counter top and aim it at people’s upper torso while they order their lattes. The web cam USB cable had to extend across the cafe and connect to my laptop where I had my app running. A TV monitor mounted on a wall would be connected to my laptop to display my app interface. In addition, my Arduino would be connected to the same laptop controlling the LEDs attached around the frame of TV.
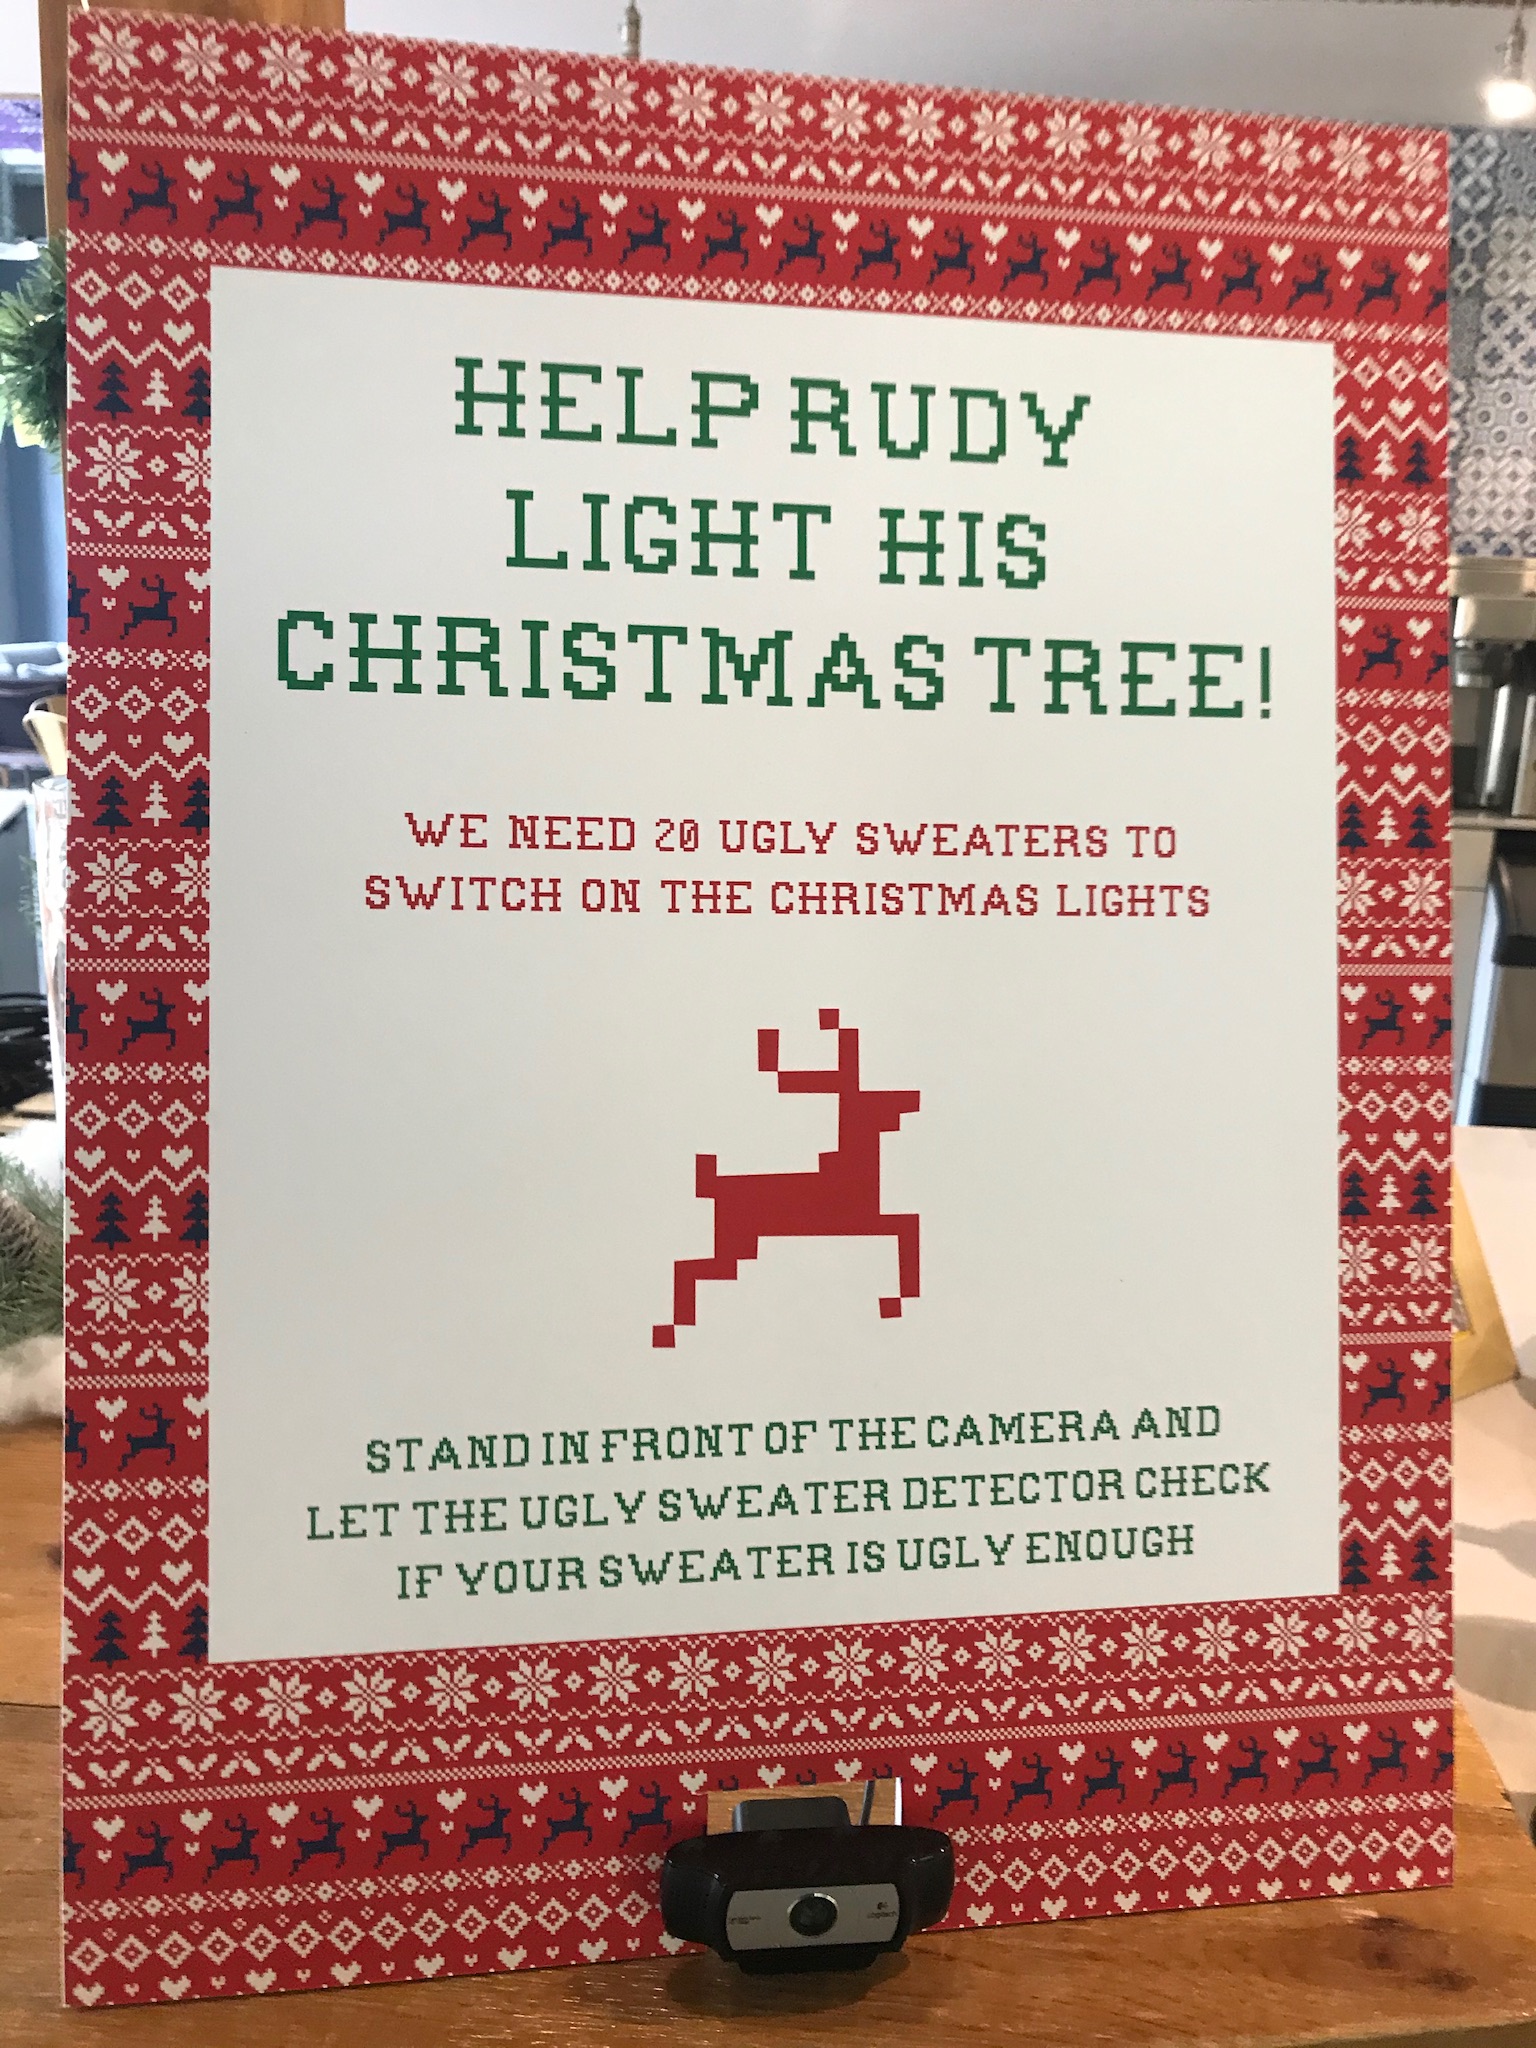
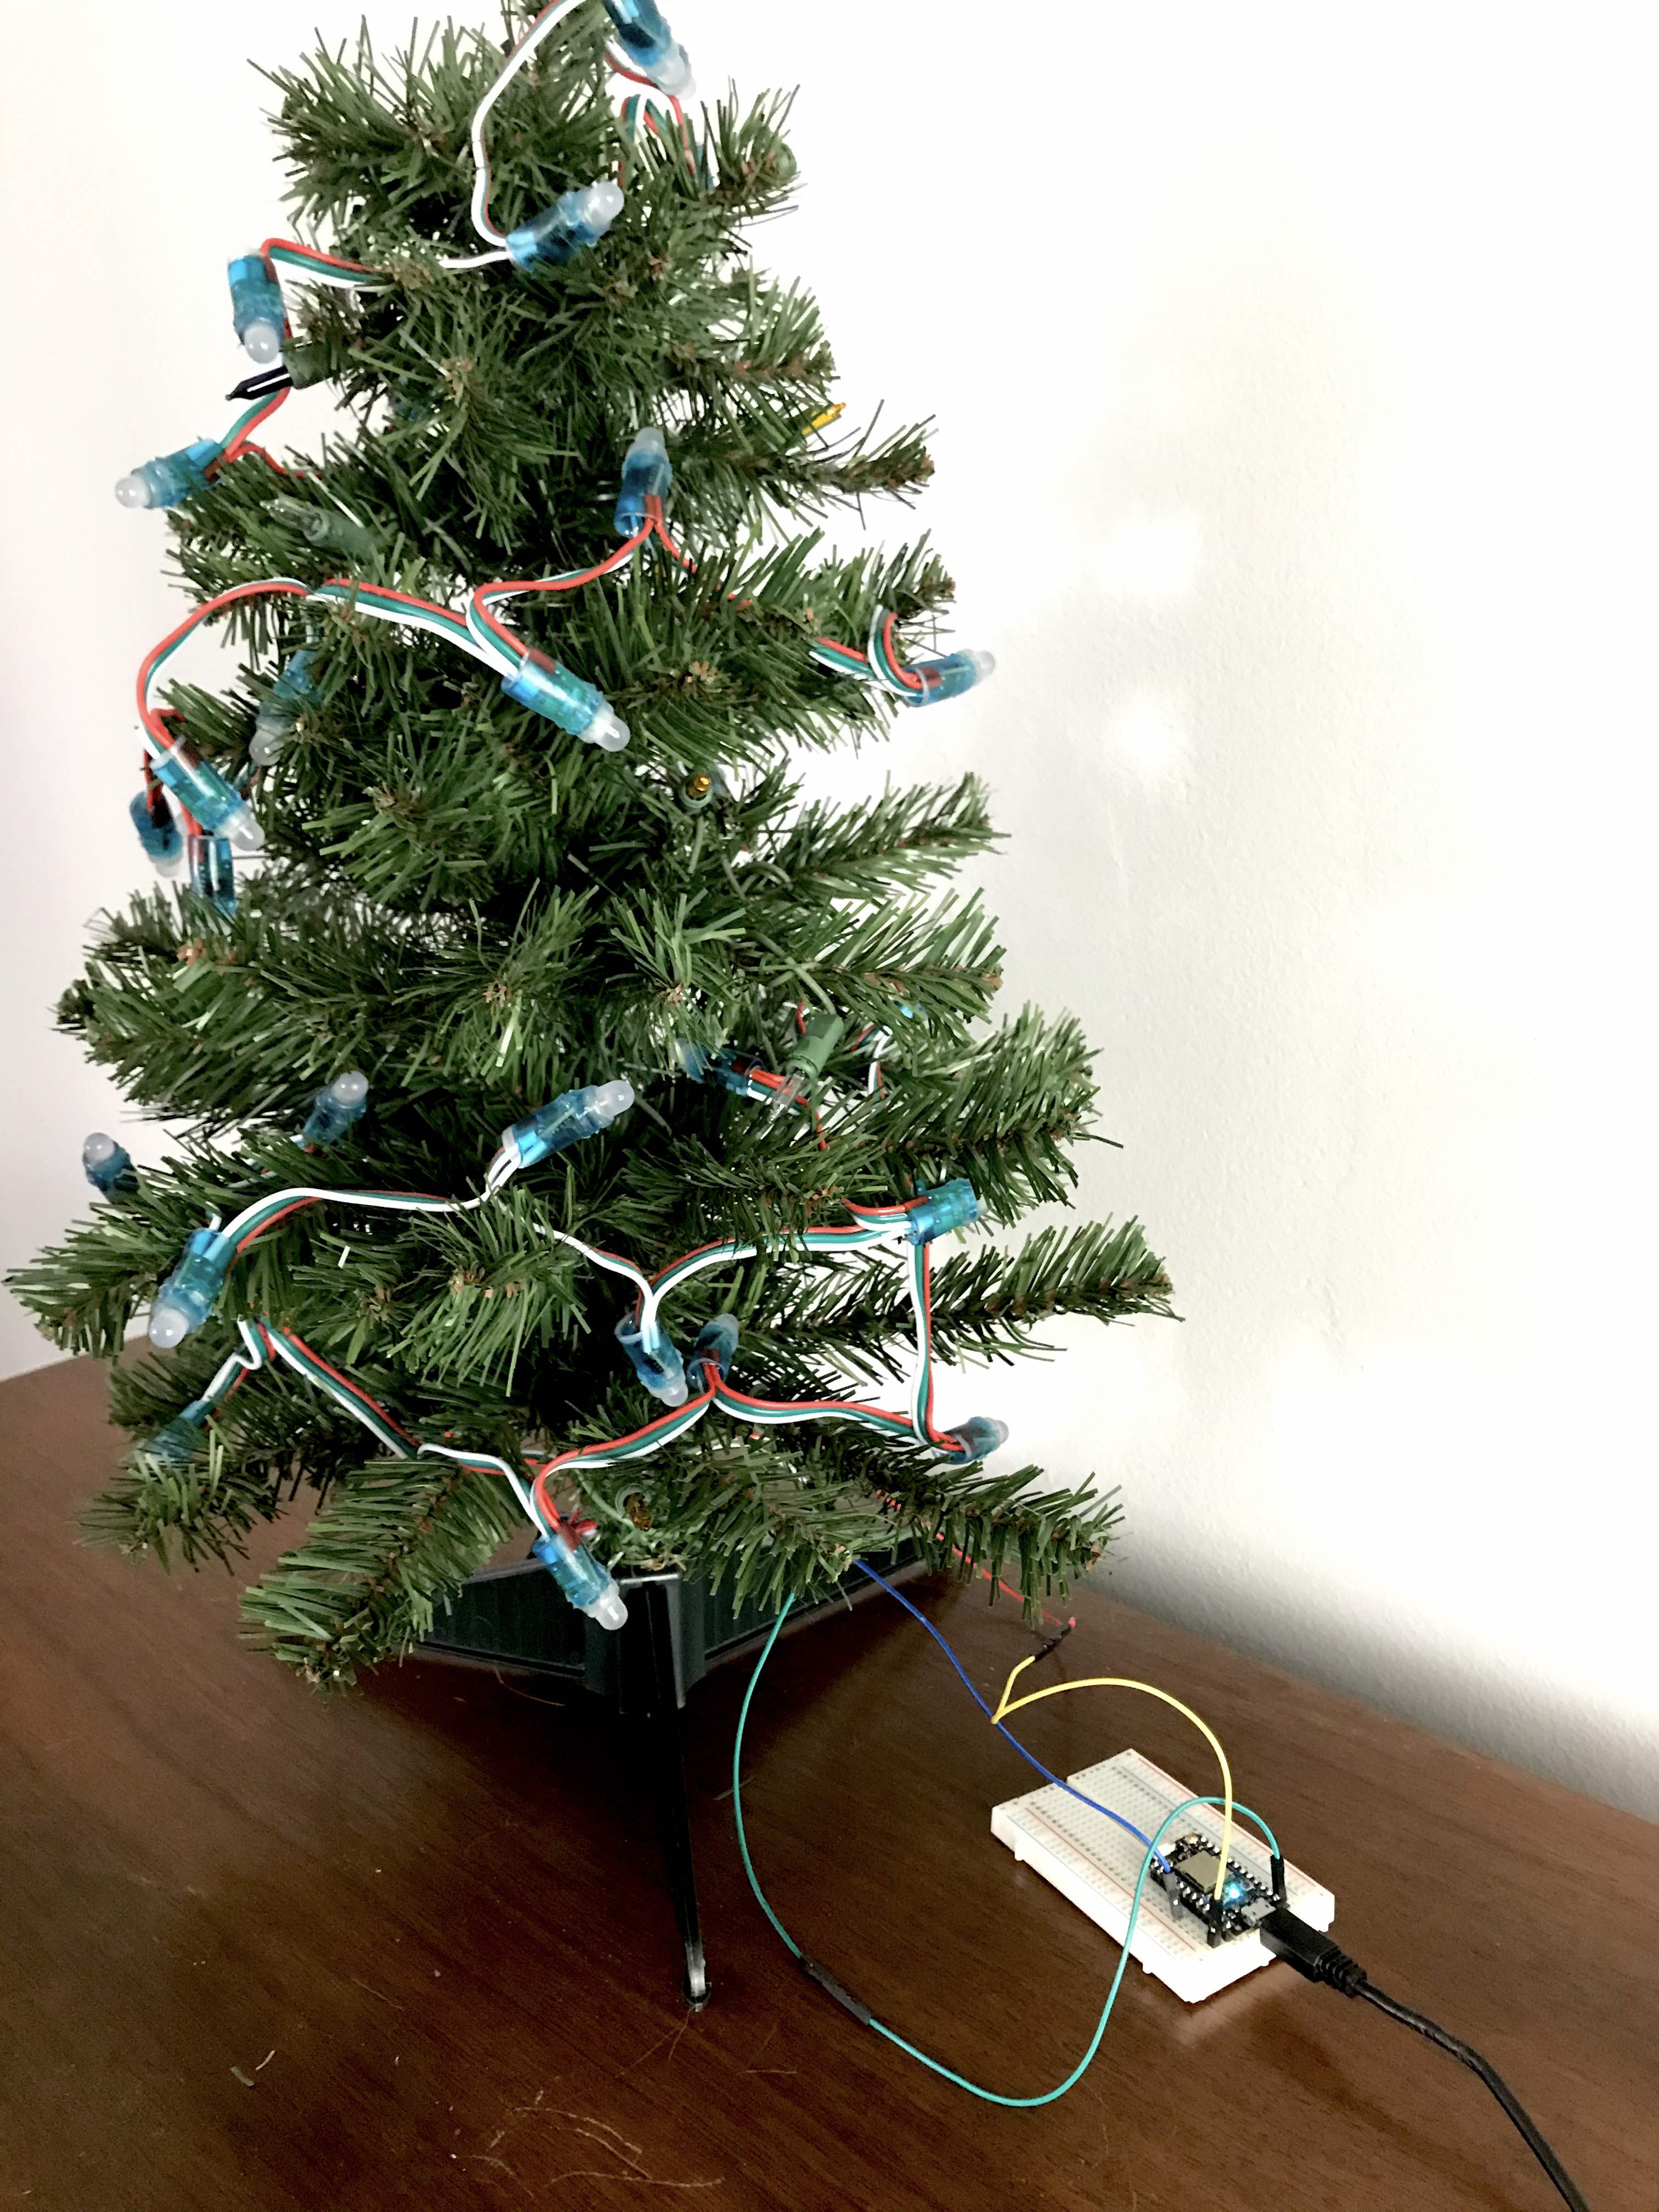
Foam board display on the cafe counter top.
Another set up was displaying the live stream of my Christmas tree at my home. At home, I had to place a Nest cam facing my Christmas tree with the LEDs turned off. The LEDs on the tree were connected to a Photon that was connected to my home’s wifi. It’s sole purpose was to wait and listen for a command from the app running at work. After the 20th and final detection, the app dispatches the command to the remote tree.
Tiny tree in bedroom on standby.
At work, I had to display the live feed at the cafe. So I needed another laptop connected to a display near the counter where people could see the tree on standby. I could have probably used the same laptop running the app, Arduino, and webcam but I didn’t want the laptop to overload and crash during the presentation.
Creating signage on the cafe counter was created to better alert people of what was going on. Just placing the camera on the counter with no signage would have been less engaging. An 11×17 inch foam board was created to call out users to show your sweater to the camera.
There was also a flyer designed the day before to announce the set up of the exhibition on the cafe. This flyer was posted on our agency’s public chat room where most workers visit every day for announcements.
Public Reaction
For the most part, people did understand the concept of the exhibit. Maybe more than half understood the instructions and the payoff. I would say 30 percent of visitors had to be guided on how to participate. The overall reaction was positive and people did have a good time getting involved as participants. It took a while to ramp up a crowd but at the end, but people were amazed of the final payoff.
The final detection of the project.
Learning from the Experience
The project itself wasn’t easy to pull off. The app and hardware development was challenging but the hardest part is not knowing how the public would interact with the whole exhibit. It would have been total failure regardless of how well the software or hardware worked. Relying on every single user to understand the concept was something I knew I wasn’t going to achieve. A handful of people didn’t believe the capability of the project and thought it was all mocked. I did spent time with participants explaining how everything worked behind the scenes without being too technical.
With everything said, people were amazed and I was amazed of how well everything worked.
Covering your sweater with pug will not work. Maybe in version 2.0.
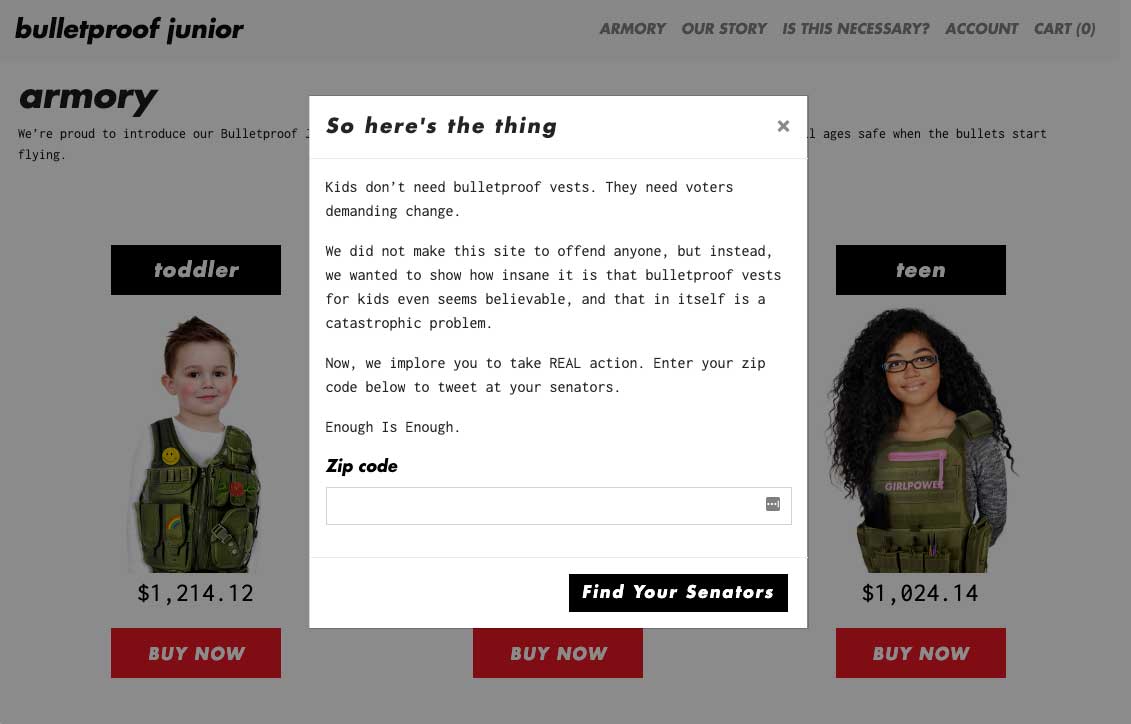
Several months ago I was involved in a viral campaign with various folks from the ad industry and it received plenty of media coverage. The campaign was focused on escalating the attention on the government’s negative record on gun control. After the Parkland high school shootings, the team felt motivated to bring into question the new realities of where the country is headed if we are passive about the current gun crisis. The message was to challenge parents of a possible new reality of having our children wearing bulletproof vests in school. I helped develop a website that emulates a company that manufactures children’s vest from kindergarten to high school. The intention was to drive as much traffic from social to this fake store while sending a message. The kicker is when the user clicks on buy now or other buttons, they are prompted to an interface where they can directly tweet a message to their local senator and demand action.
The way I constructed this website was fairly to the point. I had a short time frame and no budget. Time was very crucial because we wanted to launch this while the topic of discussion in the media was still relevant. I only had time to work on this after work and it needed to be done in a few nights. The most time spent was to find the right API for locating your local senator. The Google Civic API had good documentation so I went with that. I made a form where the user inputs their zip code. Then they receive a prompt to a tweet with the included twitter handlers from their local senators, the ready-made message, and the relevant hashtags.
Analytics was important to this project. I pushed for it even though it would cost me more hours of work, at night. It was very important to understand who was engaging on the website from what part of the country, at what time, what they clicked on, how long they spent on each page and so on. It was an opportunity to learn more in-depth Google Analytics and its tag manager. Learning Google tag manager was not a simple process. Initially, I would just insert the Javascript in the footer for each page and call it a night. But this time I wanted to be more ambitious. Even though the process is well documented, there’s still a lot of nooks and crannies to iron out. Navigating the dashboard was cumbersome. Most of the time I would write the tags to my buttons but never got a handshake/response from my dashboard. Eventually, they worked and it was amazing watching them work in real-time. I spent lots of time looking at the instant feedback of clicks and dwell times. After a days-worth of analytics, we made modifications to our site that made a difference in the long run.
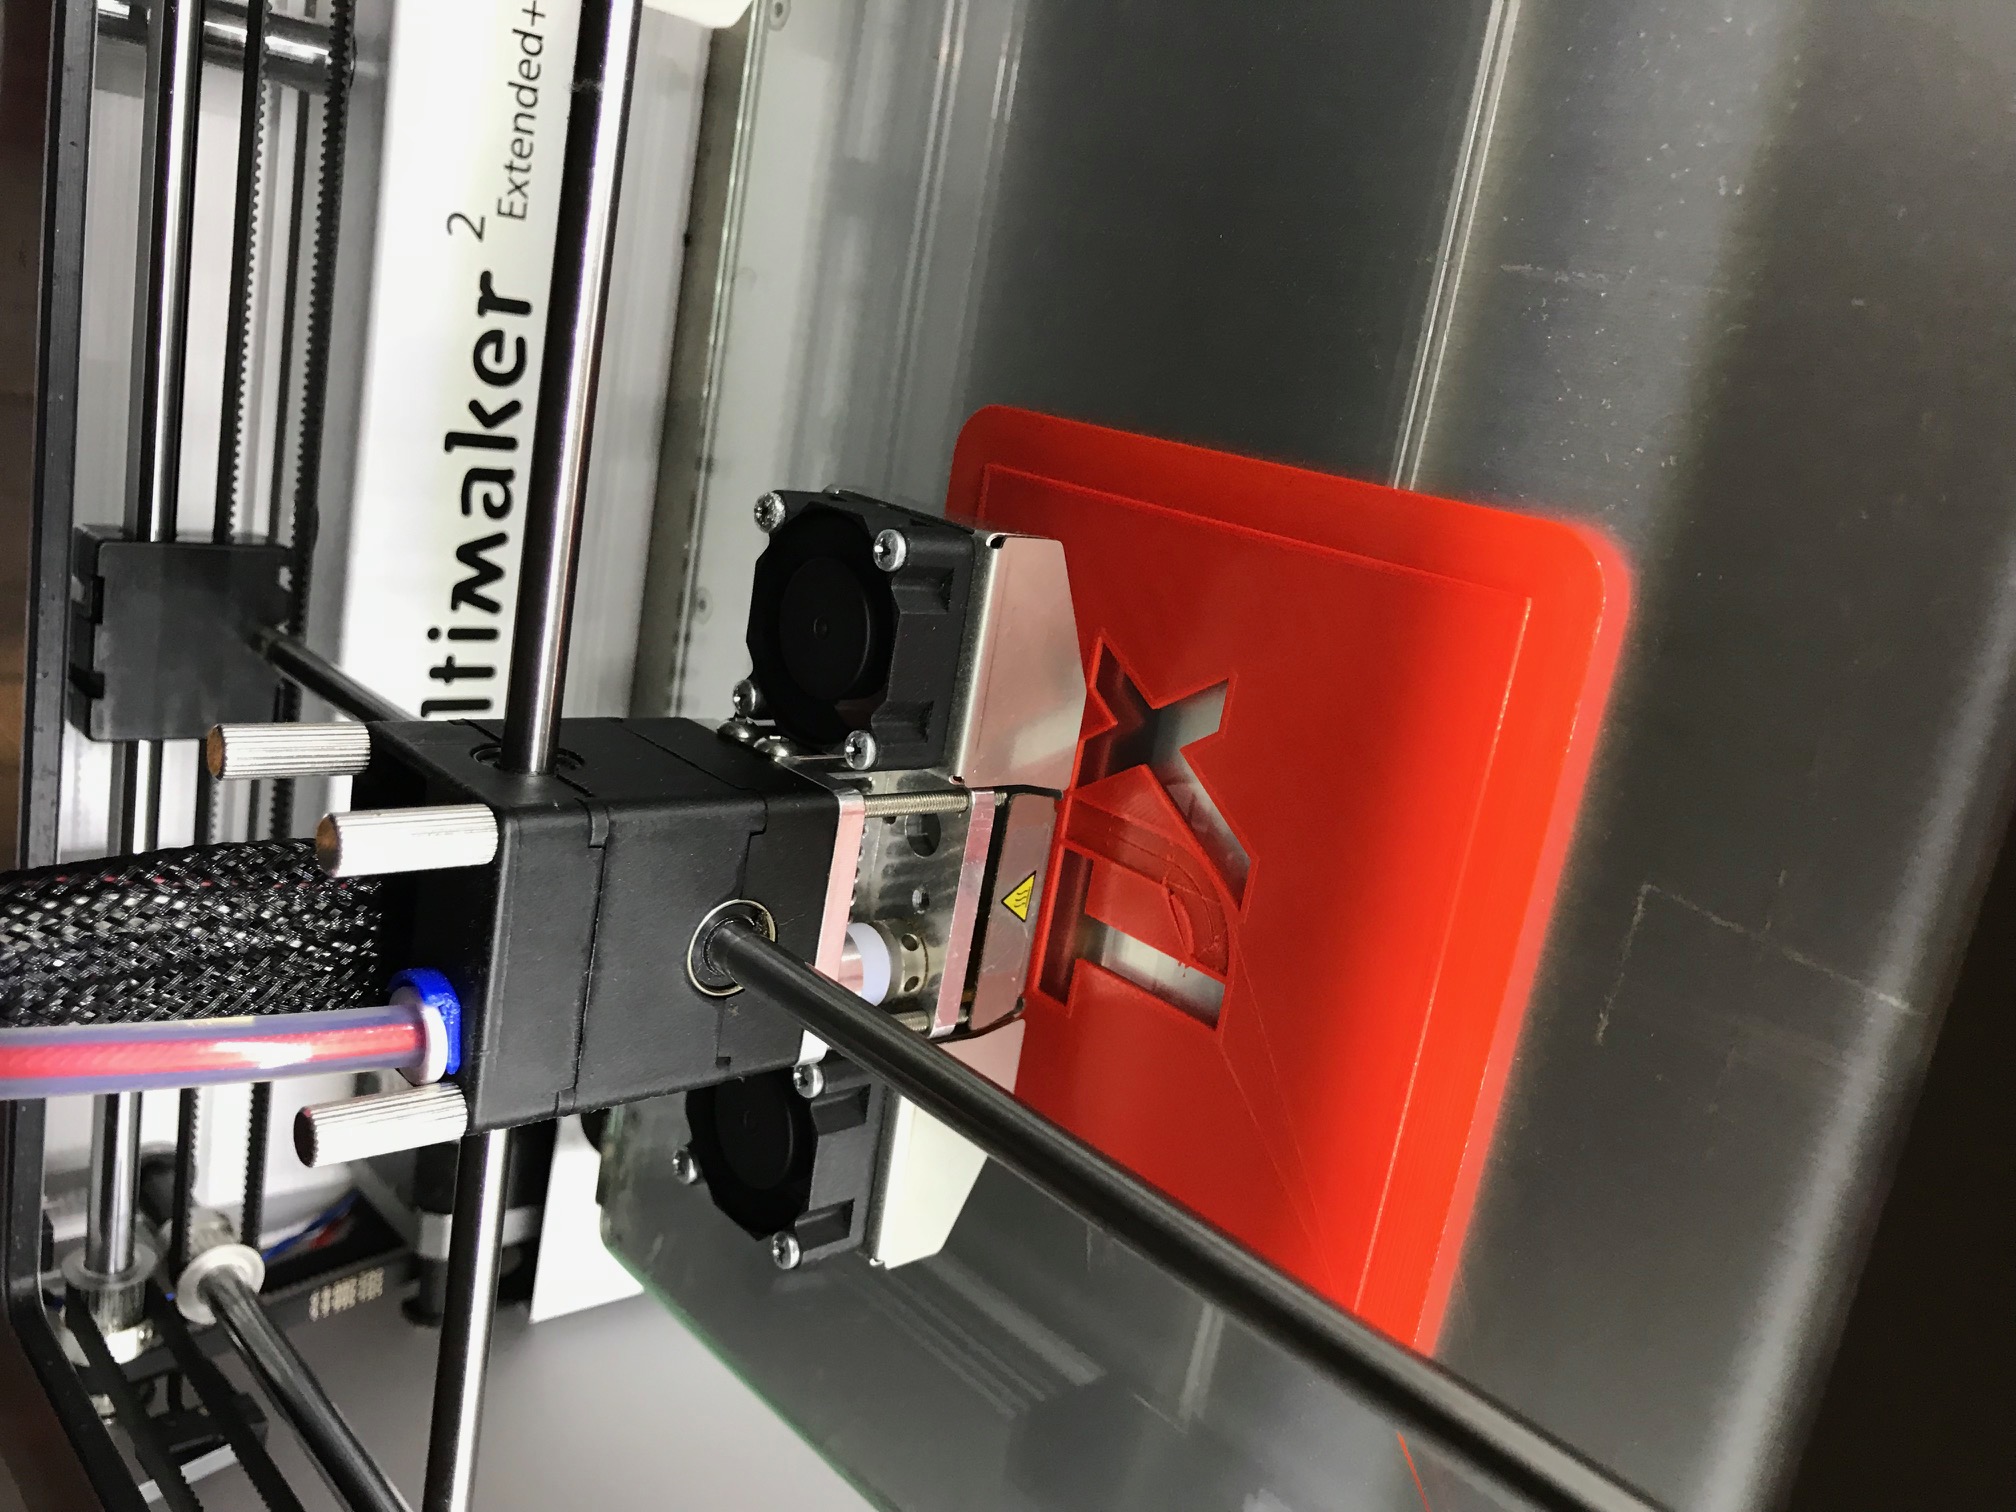
Before even learning about 3d printing I kinda had an idea how the process would be. Being familiar with 3d concepts, I knew there needed to be a 3d file format that needed to be interpreted by the printer. I was fortunate to be given access to an Ultimaker 2, maker bot.
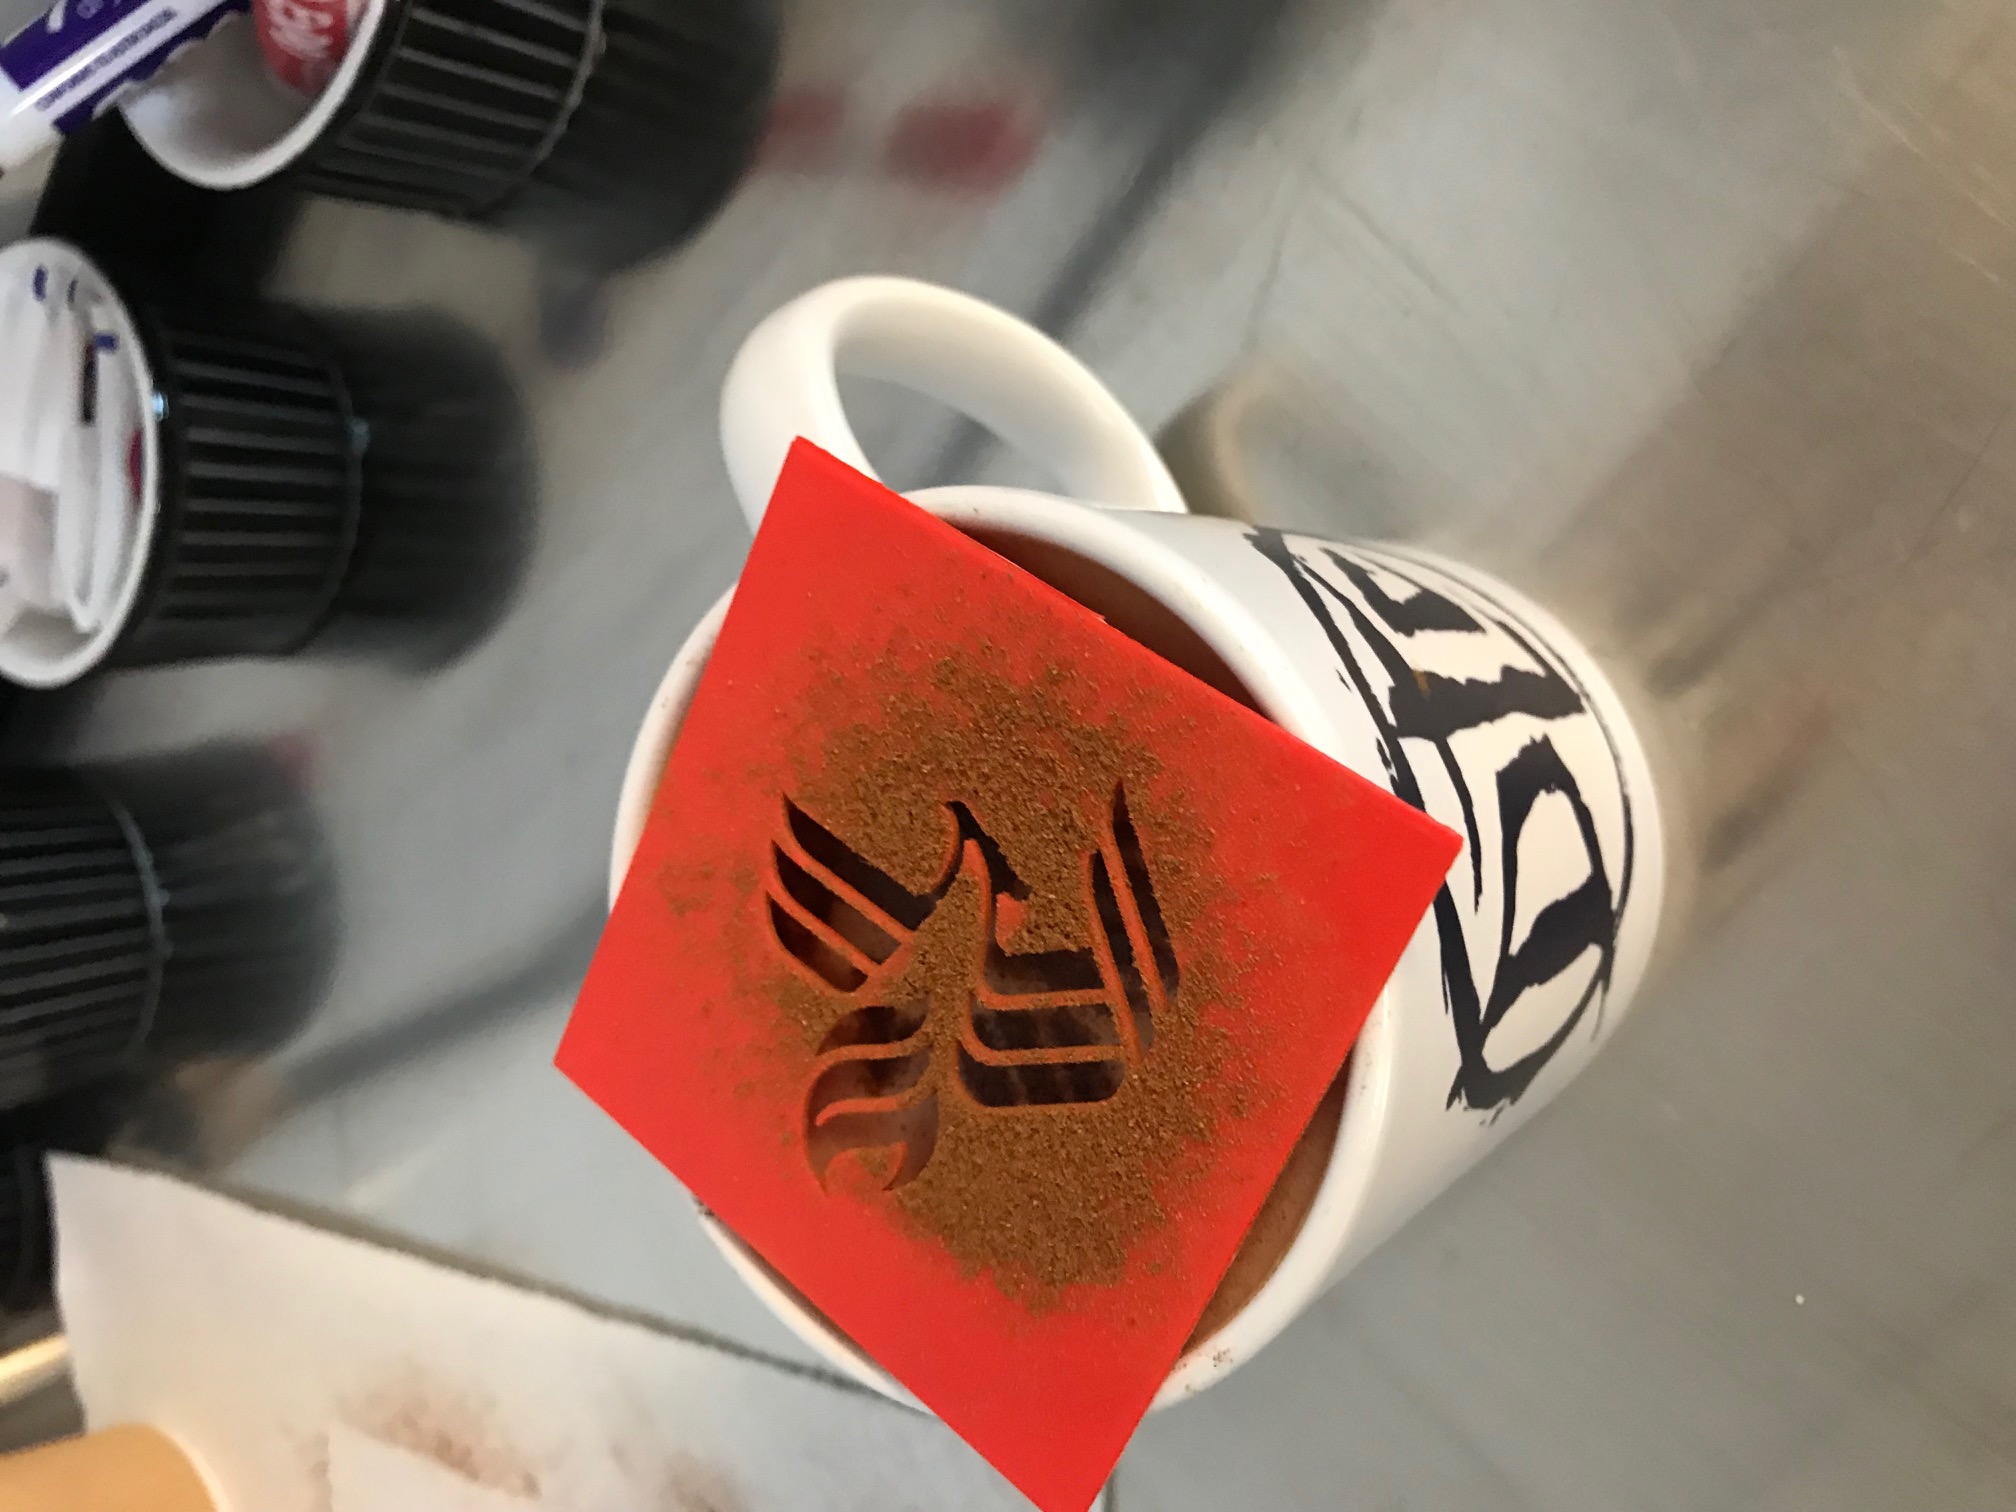
Our client was coming over to the agency for breakfast. So our account team decided to impress by making a reusable stencil to make logos onto the tops of lattes. I created a prototype quickly making a 3d object from an illustrator file using Blender. I was simply extruding the points from the eps file and scaling a bit the thickness. After, I exported the file to a .obj file. Then I had to convert the obj into a readable format the Ultimaker accepts, and we’re in business. When using the Ultimaker app, Cura, the user interface visualizes how big in scale the object will be inside the printer. This helps the user have a precise idea how big the object will be.
I didn’t wing this without mistakes. Reading documentation and some trial and error sessions was the way I learned to demystify this really cool tool.
There’s another industry that sometimes tries new ways to engage users. I’ve visited many museums around the world and sometimes exhibit curators make the effort on trying new interactive platforms. Some fail but some are good. I visited a contemporary museum in Stockholm where they had an Andy Warhol exhibit. They used tablets as mini-kiosks to show the history of his work. It looked amateurish coming from a big museum. But who knows, maybe they ran out of time?
A better example of using new technology in an art exhibit was Bjork’s Digital exhibit in Los Angeles. Developers collaborated with the artist/musician in making interactive pieces for her songs. It was very visual and interactive. Each song was represented differently and the overall exhibit was a unique experience.
So I did this project in an effort to replicate a real life interactive experience in a museum. It has hand gestures to move a 3D object using a Leap Motion wired with Socket.io. The hardware would be a monitor or projector, a Leap sensor, and web browser connected to a local Node server. You add all of this up and you have the tools to make a cool digital exhibit. The Natural History Museum and the La Brea Tar Pits first came to mind. A visitor can simply use their hands over the sensor with a monitor or projector nearby. In this case it could be prehistoric mammal moving in 3D space controlled with a hand gesture.
Google’s Chrome experiments never fail to impress. Everytime Google Chrome’s team release a web experiment it always reminds me how the web will never disappear and how much potential it has. One of my favorite Chrome Experiment was the Arcade Fire site. At the time I never heard of the band, but the site rekindled my love of my career choice. The one site that started my love for the digital web was the Donnie Darko’s website developed by Hi-Res from the UK.
In 2013, Chrome released an experiment that included the use of a desktop browser and a mobile browser as a controller. It was one the first web experiments that used both browsers synchronously for a game. They may have used something similar to Socket.io if the two browsers talked to each other. Over the years I had the itch to try and make something similar. So I decided to do a project with the use of a mobile and desktop browser in a VR environment.
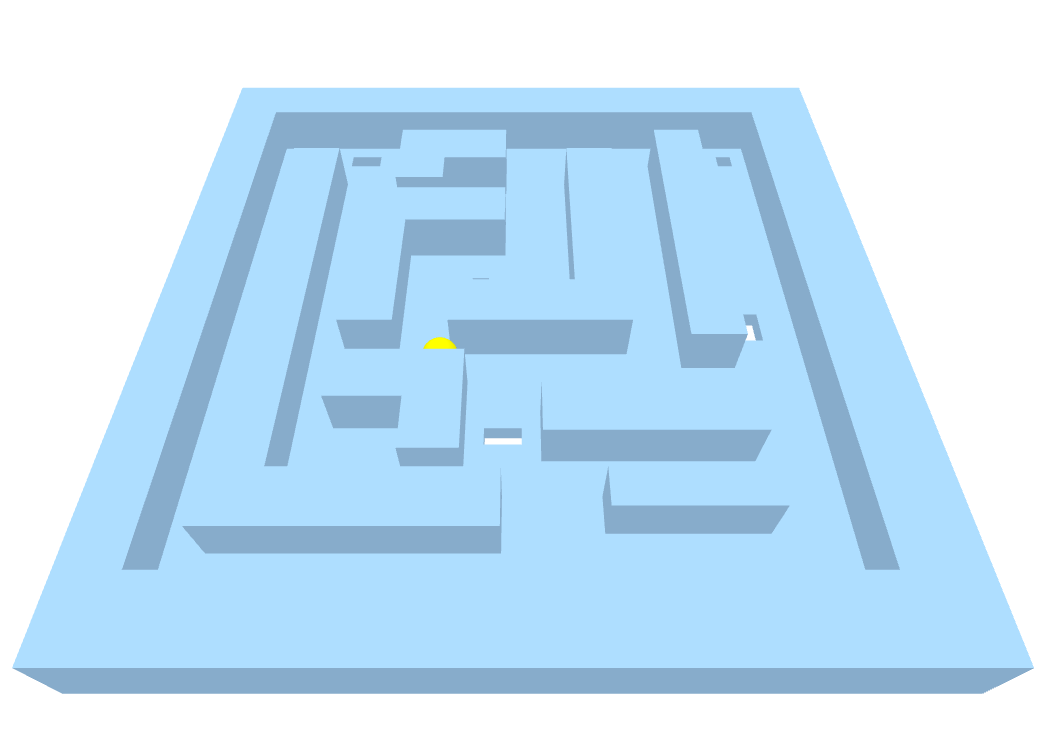
I knew I had to use Socket.io to have my Node server do requests and responses between the two browsers. I used Aframe VR to set up the 3D environment along with React as my front end library. In React I used states to update the Labyrinth’s x y z coordinates. Webkit provides a method to access a mobile device accelerometer coordinates. I used those coordinates as parameters in a function that sends it to the Node server and then dispatches it to the listener on the Labyrinth side. It works great, and I never get bored playing with it.
I don’t like Coors Light beer BTW. Especially after discovering that its mainly corn-based. Anyway, this is not an article about beer. The reason why there’s a Coors light bottle in this experiment is that I couldn’t find a free open-source 3D model. So I used this Coors beer bottle for my prototype.
Mozilla’s Aframe web VR community is growing. The contributors are increasing and more and more the VR library becoming robust. I became aware someone made an Aframe plug-in that integrates Leap Motion. Leap Motion is a hardware sensor that tracks hand and finger gestures. Don McCurdy, a regular contributor to the Aframe community, wrote the plugin and is available on Github.
After installing the package to my VR project, I was impressed to a certain degree but not blown away. I played with the Leap in a non-web environment and it feels smooth and responsive. But on the web VR front, the Leap feels sufficient but lacks control. Why is Leap important to the developer community? With the Leap, you no longer need hand controllers, and VR apps become more immersive. Having it available on the web makes experiences even more accessible. Recently, JP Morgan Asset management announced $50 million in funding. Not bad coming from a project that started as a Kickstarter.
I illustrated a Dayton wheel. There’s something unique about this car rim. Its very prevalent in LA car culture and they really stand out. I may make this into a t-shirt or something. Trademark pending. 😉